Backward Chaining

This is a particularly useful technique to use when teaching a child how to get dressed or undressed. This technique can also be helpful for teaching any task that has a number of steps.

Click on the sections below for quick access to each area or scroll down the page to see all the content.

Backward Chaining

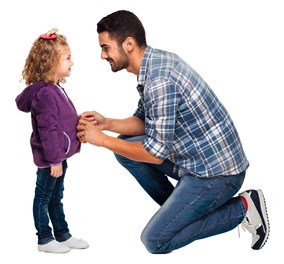
When teaching a new skill we often start at the beginning. This can be challenging for children sometimes as they get frustrated. You can give your child a sense of achievement by using the backward chaining technique. Backward chaining is particularly useful when learning self-care skills like dressing. It can also be helpful when teaching younger children. It is also useful when someone is having difficulty learning new skills.

So what is backward chaining? You start by breaking the task down into small steps. You teach your child the last step first, working backwards from the goal. You complete all the steps except the last one. You get your child to practice the final step. Your child will enjoy the success that comes from completing a task. Once your child can do the last step you complete all the steps except for the last two. You teach your child the second from the last step and they then complete the last step themselves. Even more success! Keep going until you are teaching the first step and your child is completing all the other steps.

This is a particularly useful way to teach dressed or undressed. It can also be helpful for teaching any task that has a number of steps.

How to Use Backward Chaining

Here is the list of steps for you to use when you want to try the backward chaining technique:

  1. Break the task down into steps. It can help to do the task and write down each action in turn. Below are some examples of the steps for some common tasks.
  2. Now complete all the steps of the task for your child/young person except for the last one.
  3. You need to teach your child/young person the last step. You can help your child/young person by showing them, telling them or doing the action with them. See the Occupation section on the General Hints and Tips page for more information.
  4. Practice, practice, practice this step until your child/young person can do it without your help.
  5. Now complete all the steps except for the last two.
  6. Teach them the second last step and let them complete the last step.
  7. Once they can do the second last step move on to teaching the third last step. Like before you complete all the steps except the last three. You teach them the third last step and let them do the last two steps themselves.
  8. Keep going like this until they can do all of the steps.


Here is a video example for putting on socks:

Example of Backward Chaining Method

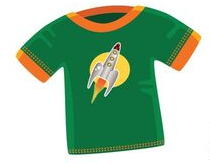
Example of Putting a T-Shirt on Using the Backward Chaining Method

First, you break the task down into steps.  Here are the steps of putting on a t-shirt.

  • Lay the t-shirt front side down on the bed/floor/table with the lower edge nearest to your child.
  • Pick the back of the t-shirt up and place it over your head.
  • Push one arm through the sleeve.
  • Push the other arm through the sleeve.
  • Pull the t-shirt down.

Now follow this process for backward chaining.

First time:
1. You lay the t-shirt down.
2. You pick up the t-shirt and place it over your child’s head.
3. You hold out the first sleeve and put their arm through the sleeve opening.
4. You do the same with the other arm and the second opening.
5. Teach your child to pull down the t-shirt.

Second time:
1. You lay the t-shirt down.
2. You pick up the t-shirt and place it over your child’s head.
3. You hold out the first sleeve and put their arm through the sleeve opening.
4. Teach your child to push their second arm through the sleeve opening.
5. Your child pulls down the t-shirt.

Third time:
1. You lay the t-shirt down.
2. You pick up the t-shirt and place it over your child’s head.
3. Teach your child to hold the first sleeve and put their arm through the sleeve opening.
4. Your child pushes their second arm through the sleeve opening and pulls down the t-shirt.

Fourth time:
1. You lay the t-shirt down.
2. Teach your child to pick up the t-shirt and place it over their head.
3. Your child pushes both arms through the sleeve openings and pulls down the t-shirt.

Fifth time:
1. Teach your child to lay the t-shirt front side down on the bed/floor/table with the lower edge nearest to them.
2. Your child picks up the t-shirt and places it over their head, pushes both arms through the sleeve openings and pulls down the t-shirt.

Your child can now put their t-shirt on by themselves.
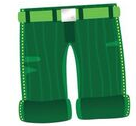
Steps for Some Everyday Activities

Putting on Pants:

  • Sit on the floor, bed or chair.
  • Hold pants by the waistband, label at the back, picture (if applicable) at the front.
  • Lower pants and lift one leg into a leg hole.
  • Put other leg into the second leg hole.
  • Pull pants up to knees.
  • Stand up and pull pants up to the waist.

Putting on Trousers:

  • Sit on the floor, bed or chair.
  • Hold trousers by the waistband, look for the label at the back.
  • Lower trousers and lift one leg into a leg hole.
  • Put other leg into the second leg hole.
  • Pull trousers up to knees.
  • Stand up and pull trousers up to the waist.

Putting on Socks:

  • Sitting on the floor with back against the wall or on a chair.
  • Hook both thumbs into the opening of the sock and hold onto the edge.
  • Push toes into the sock.
  • Lift the foot and pull the sock over heel.
  • Pull sock up the leg.

Putting on Shoes:

  • Sitting on the floor with back against the wall or on a chair.
  • Slip shoe over toes. Place the index finger inside the heel of the shoe and pull the shoe the rest of the way over their foot.
  • Place foot on the floor and stand up to push the foot down into the shoe.

Using a Spoon:

  • Hold the spoon in one hand.
  • Hold the bowl/plate in the other hand.
  • Scoop the food.
  • Bring the spoon to your mouth.
  • Put the spoon into your mouth.
  • Remove the food from the spoon using your lips, tongue and teeth.
  • Remove the spoon from your mouth.
  • Repeat. 

Using a Knife and Fork:

  • Hold the fork in your helping hand and hold the knife in your dominant hand.
  • Stab the food with the fork and press down.
  • Saw back and forth with the knife.
  • Eat the cut up food.